Oracle OAF Personalization, Adding Flexfield on OAF / HTML page
Oracle OAF Personalization, Adding Flexfield on OAF / HTML page
In this task you want to set-up the descriptive flexfield in the Unprocessed Requests page in Oracle Sourcing. You will also set-up segments for the flexfield.
- Log in as your XXX_USER.
- Select the iProcurement responsibility.
- Select the Non-Catalog Request subtab.
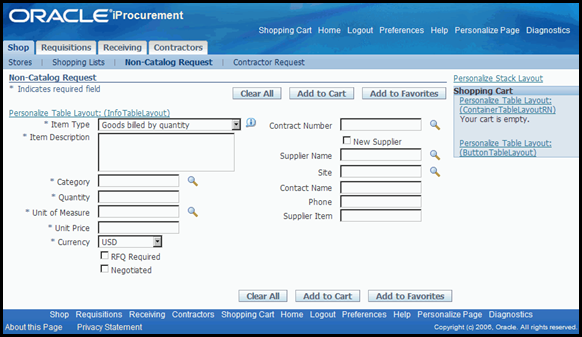
- About this Page link to determine if there is a flexfield available on this page, and note its name and application short name. In our case, the Application Short Name is PO, and the flexfield name is PO_REQUISITION_LINES.
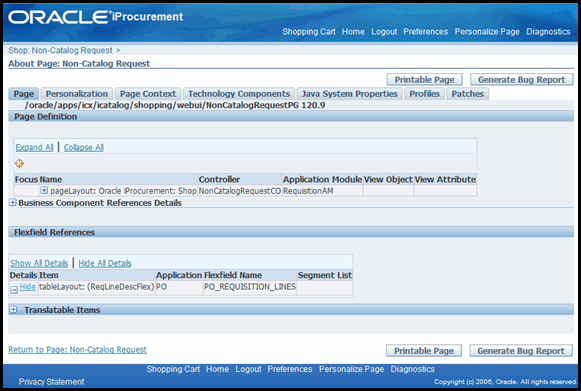

- Select the Return to Page: Unprocessed Requests link.
Task 2: Define Descriptive Flexfield Segments
- Go to the Home page and switch to the Application Developer responsibility.
- Navigate to the Descriptive Flexfield Register form, Flexfield: Descriptive > Register
- Query the Name field using PO_REQUISITION_LINES. Note that the Title of this flexfield is Requisition Lines. You will need that name to set-up the segments.

- Close the Descriptive Flexfield Register form, and open the Descriptive Flexfield Segments form, (N) Flexfields > Descriptive > Segments.
- Query the Descriptive Flexfield Segments by Title using Requisition Lines.
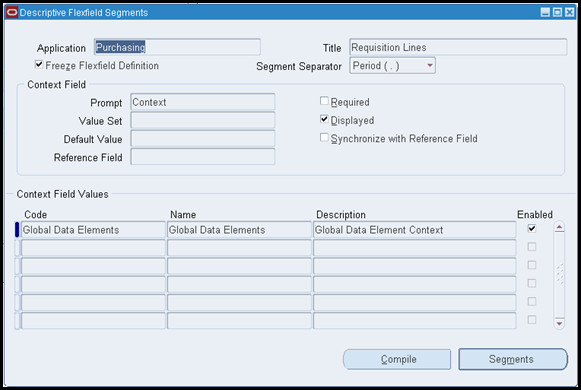
- Unfreeze the flexfield by deselecting the Freeze Flexfield Definition checkbox.
- Select OK for the warning message.

- Global Data Elements code, and then click the Segments button.
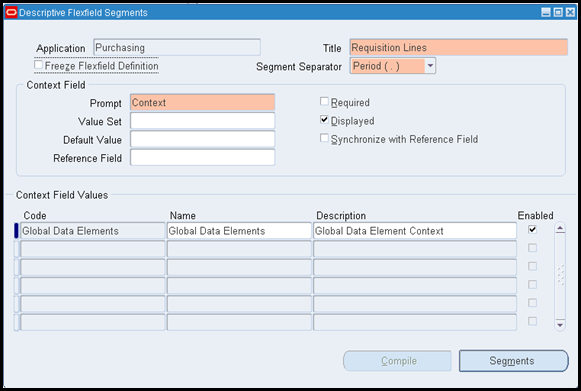
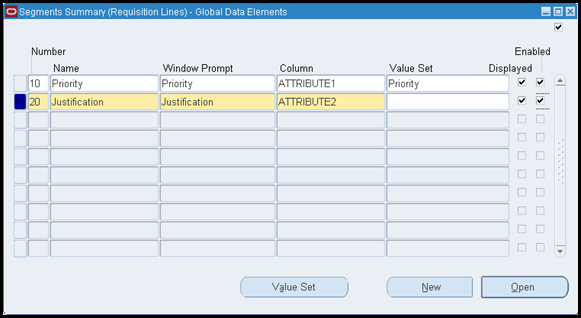
- Set the Number to 10.
- Set the Name to Priority.
- Set Column to ATTRIBUTE1.
- Set the Value Set to Priority
- Tab to the next row.
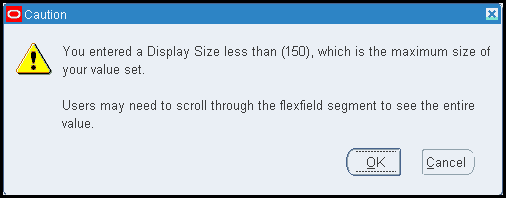
- OK on the Caution dialog box that opens.
- Set the Number to 20.
- Set the Name to Justification.
- Set Column to ATTRIBUTE2.
- Tab to the next row.
- Click OK on the Caution dialog box that opens.
- Save your work.
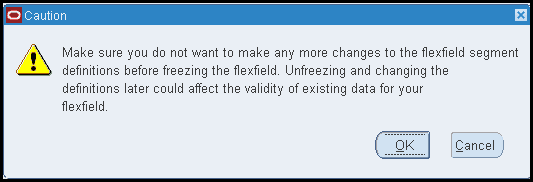
- Check the Freeze Flexfield Definition checkbox.
- Select OK for the warning message.
- Save your work again to compile the flexfield.
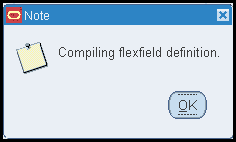
- When the flexfield is compiled successfully, you will get a Note window to notify you.

Task 3: Enable Descriptive Flexfield on Page
- Exit the forms-based Applications, and return to the Personal Home Page.
- Select the iProcurement responsibility.
- Select the Non-Catalog Request subtab.
- Select Personalize Page.
- Select Complete View.
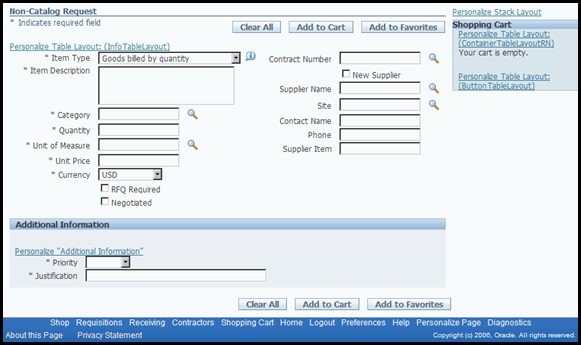
- Select the Flex’s Personalize icon, and set the Rendered property at the Site level to true.
- Select the Labeled Field Layout: (ReqLineDffLabel) personalize icon, and set the Rendered property at the Site level to true.
- Select the Header: Additional Information personalize icon, and set the Rendered property at the Site level to true.
- Note: You MUST do this separately for the Flex, the Field Layout and the Header (which are the Flex’s container) in order to enable the descriptive flexfield.

- Apply your changes, and Return to the Application.

Note: There is one technique of interest to both instructors and students. Often times when dealing with OA Framework pages, there are interesting quirks that might or might not appear. Things like menu items not appearing, responsibilities not appearing, and the like. Why? Because Oracle Application Framework has a cache of run-time information, and by default that cache only gets reloaded every 15 minutes. So, here is the technique to clear the cache quicker.
- From the SYSADMIN user, or any user in the Application that has the Functional Administrator responsibility, choose the Functional Administrator responsibility from the Personal Home Page.
- Choose the Core Service tab.
- Choose the Caching Framework subtab.
- Choose the Global Configuration submenu.
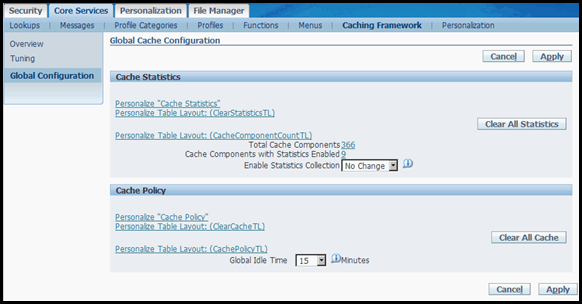
- Choose the Clear All Cache button.
- Click the Yes button at the Warning page.

If the problem was due to an Oracle Application Framework caching problem, you have now flushed the cache. Any item now required will be loaded on demand because it is no longer in the cache. Your quirk should go away.
Task 4: Create a new flexfield on the Non-Catalog Request Page
This task requires that the Requisition Lines descriptive flexfield has already had its segments defined and that the flexfield is frozen.
- Login to the Application as your XXX_USER.
- Select the XXX iProcurement responsibility.
- Select the Non-Catalog Request subtab.
- Select the Personalize Page link.
- Select the Complete View.
- Select the Create Item icon for the Page Layout: Oracle iProcurement: Shop region.
- Set the Level to Site.
- Set the Item Style to Stack Layout.
- Set the ID to XXX_StackLayout.
- Set the Prompt to XXX Additional Information.
- Select the Apply button.
- You should see your new XXX Additional Information in the Personalization Structure.
- Select the Create Icon on the XXX_StackLayout item.
- Set the Level to Site.
- Set the Item Style to Static Styled Text.
- Set the ID to XXX_FlexText.
- Set the CSS Class to OraInstructionTextStrong
- Set the Prompt to XXX Lines Flexfield.
- Select the Apply button.
- You should see your new XXX Lines Flexfield in the Personalization Structure.
- Select the Create Icon on the XXX_StackLayout item.
- Set the Level to Site.
- Set the Item Style to Flex.
- Set the ID to XXX_ReqLinesFlex.
- Set the Appl Short Name to PO.
- Set the Display Context Field to false.
- Set the Name to PO_REQUISITION_LINES.
- Set the Prompt to XXX Lines.
- Set the Type to descriptive.
- Set the View Instance to NonCatalogRequestVO.
- Select the Apply button.
- Select the Return to Application link.
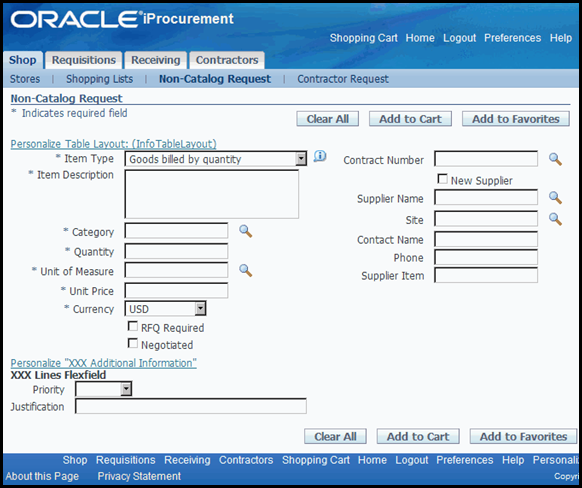 Task 5: Make Your Flexfield Visible to Your Responsibility
- Select the Personalize Page link.
- Select Complete View
- Select the Personalize icon (not the Update Item icon) for your new Stack Layout. If you personalize just the flexfield, the Static Style Text boilerplate will still appear.
- Select the Choose Levels Displayed button.
- Select just the Site and Responsibility levels to display.
- Select the Apply button.
- Set the Rendered property to false at the Site level, and to true at the Responsibility level.
- Select the Apply button.
- Select the Return to Application link.
- Verify that the flexfield is only visible for your responsibility. From the Personal Home Page, choose the iProcurement responsibility, then the Non-Catalog Request subtab, to confirm.

