Form Customization R12
Oracle R12 Form 10G Customization:
This article describe you in brief the steps of Form Customization and Registration with Oracle Apps R12.
1. In order to develop a form for Apps R12 first you have to install the Oracle Forms Developer Version 10.1.2.0.2 in your system.
2. Copy the Template.fmb file from serve to your Local PC on any specific path like d:\Apps\
a. Template.fmb would be under following path
b. /apps/apps_st/appl/au/12.0.0/forms/us
3. Coy the Required pll’s from Server to Local PC in same location d:\Apps\. All pll’s would be on following path
a. /apps/apps_st/appl/au/12.0.0/resource
Required Pll’s
APPCORE.pll
APPCORE2.pll
APPDAYPK.pll
APPFLDR.pll
CUSTOM.pll
FNDSQF.pll
FV.pll
GHR.pll
GLOBE.pll
GMS.pll
HRKPI.pll
IGILUTIL.pll
IGILUTIL2.pll
JA.pll
JE.pll
JL.pll
OPM.pll
PQH_GEN.pll
PSA.pll
PSAC.pll
PSB.pll
VERT.pll
VERT1.pll
VERT2.pll
VERT3.pll
VERT4.pll
VERT5.pl
4. setting Form’s Path in Registry
Go to Start Run Regedit HKEY_LOCAL_MACHINE Software Oracle KEY_oracle_forms
Set or Append FORMS_PATH d:\apps (“D:\apps” is the location where all required plls are placed.
Before Appending “C:\oracle_forms\plsql ”
After Appending “C:\oracle_forms\plsql; D:\apps”
5. Now develop the Form using oracle Form Builder.
a. Open the template.fmb file from d:\apps.
b. Use Save-As to change the file name, Say Employees.fmb
c. Change the module name now enter employee instead of Template.
d. Create New Block using wizard. For now select scott.emp table and select new canvas during wizard.
e. In Canvas property change Window to BlockName or you can create new window as well and assign it to your canvas.
6. Apply property classes to each item to ensure the same look and feel as the rest of Oracle Apps forms. For each Module, Canvas, Window etc., apply the Property Classes that is most appropriate.
Item Type Property Class
Module MODULE
Canvas CANVAS
Window WINDOW
Data Block BLOCK
Text Item TEXT_ITEM
Display Item DISPLAY_ITEM or EXT_ITEM_DISPLAY_ONLY
Creation Date CREATION_OR_LAST_UPDATE_DATE
Last Update Date CREATION_OR_LAST_UPDATE_DATE
To apply the property class, click on the small button (on the right) on the “Subclass information” property of the property sheet of each item.
In the “Subclass Information” Window choose the property class radio button. Then choose the correct property class for the current item.
6. From the Module property Change the First Navigation Data Block property to EMP (Emp is the Block you created earlier )
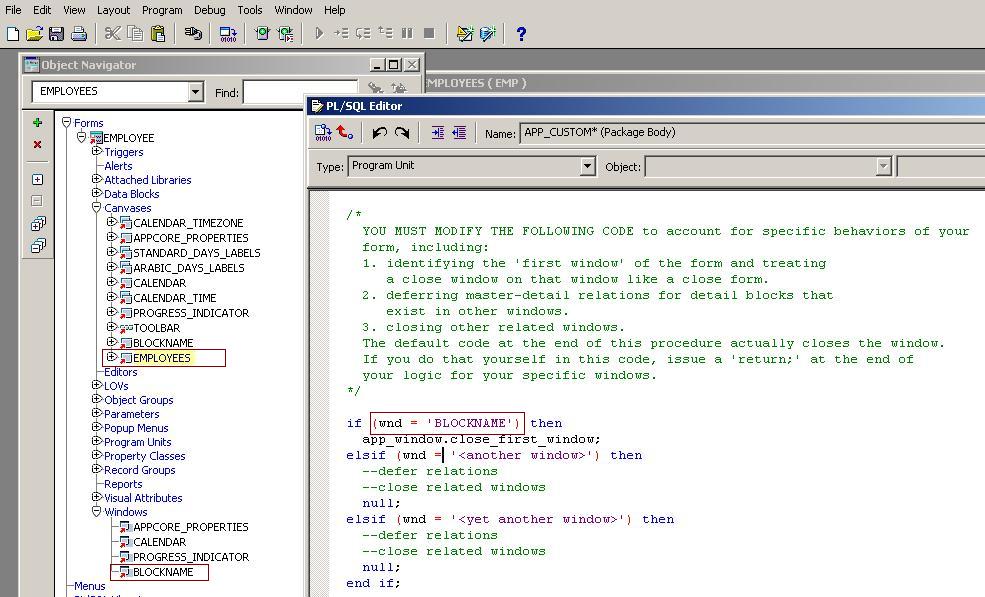
7. Open the APP_CUSTOM.CLOSE_WINDOW program Unit and modify the block name as following.
if (wnd = ‘BLOCKNAME’) then
app_window.close_first_window;
Note that “BlOCKNAME” is window name which we assign to the new canvas
- Now Compile your form Ctrl+Shift+K . It should compile successfully.
- Now transfer your employee.fmb file to server in custom_dev. You can use Telnet, WinSCP , Putty etc… be sure select binary while copying in the server.
- Set the environment variable using Telnet. Foe me it is . APPebs_ebsprod.env
- Use following command to compile form
frmcmp_batch.sh module=<form name>.fmb userid=apps/<apps passwd> output_file=<form name>.fmx module_type=form batch=no
compile_all=special
Be sure there shouldn’t be any error.
- Move the File to /apps/apps_st/appl/PO/12.0.0/forms/us. I am assuming to attach this form with Purchasing Module.
Now register the Form in Oracle Apps
- Go to the Application Developer Responsibility.
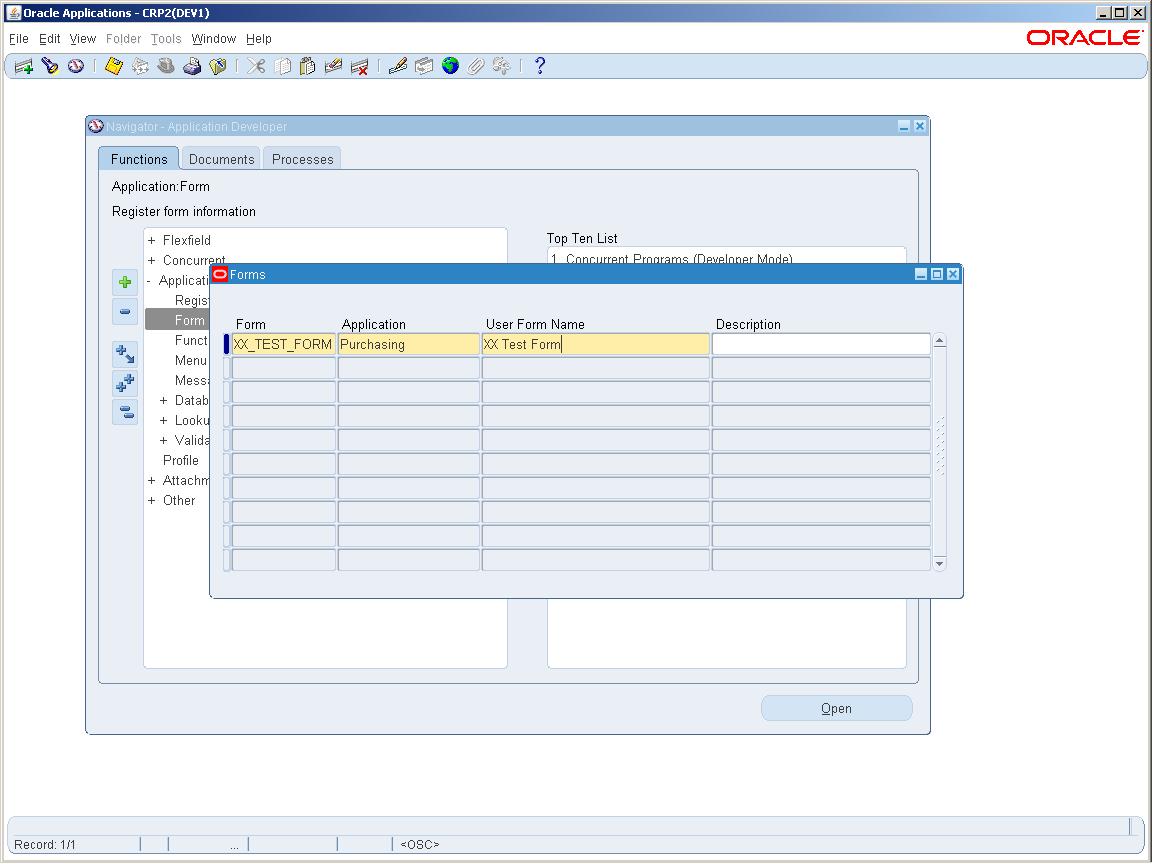
- Navigate to ApplicationàForm and define the form here. Write the Form name which you have saved at server side PO folder. Select application from LOV.
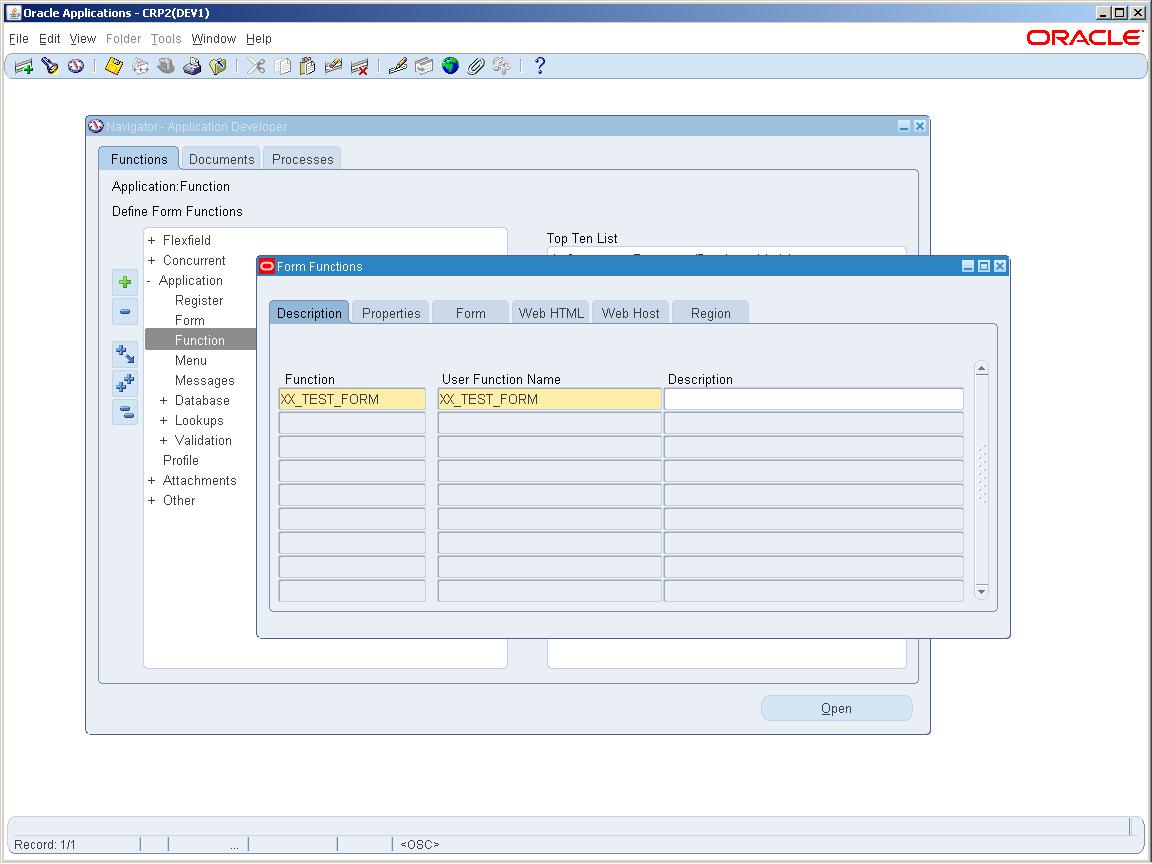
3- Define the Function for Form. Application à Function. Give Unique Function and User Function Name
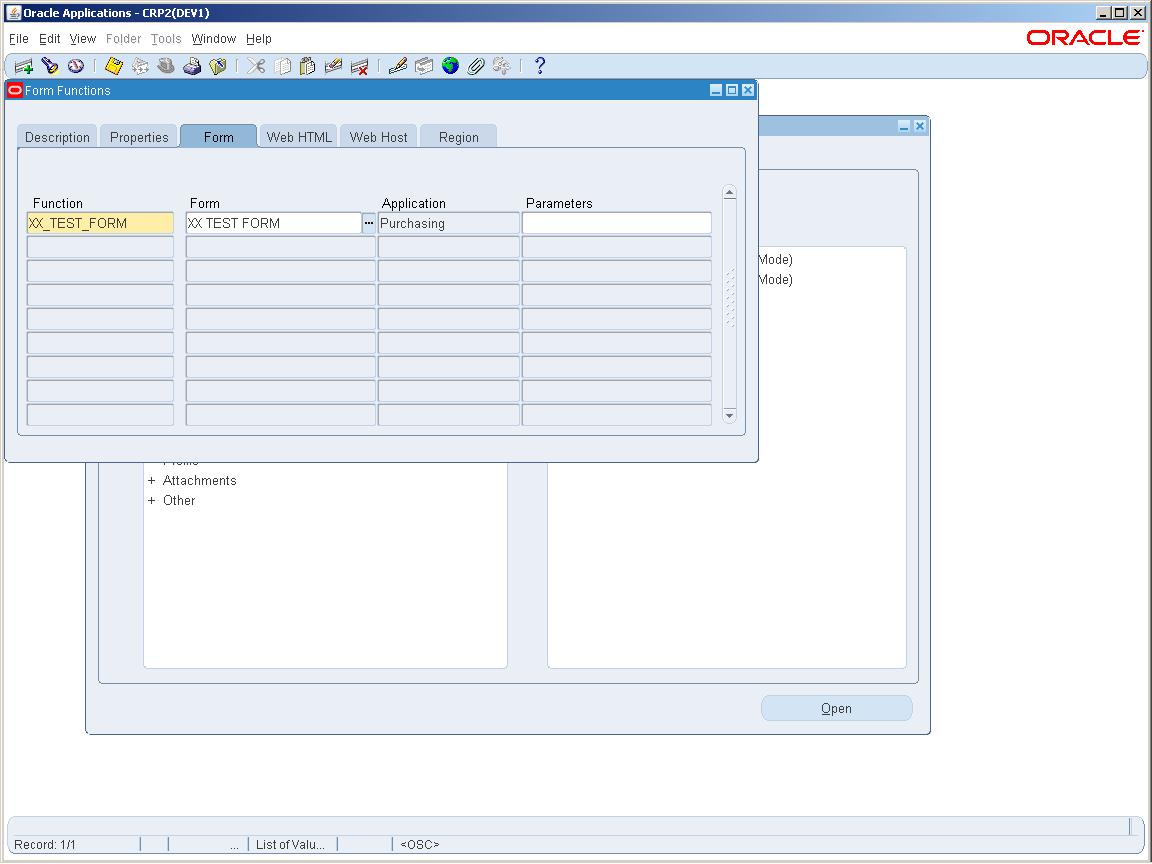
4- Select the Form Tab and select the same Form from Form LOV which you defined in step- 2
5- Now to assign the form to a Menu select Application à Menu
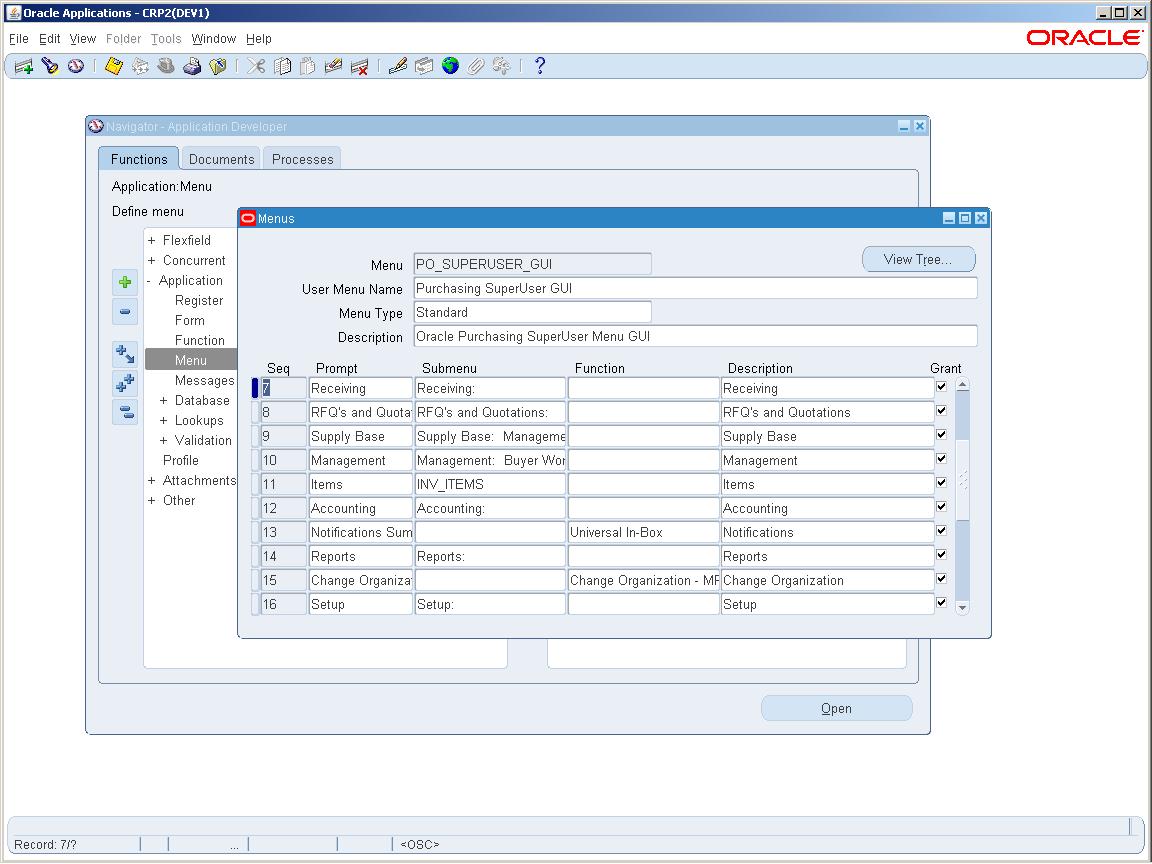
Here you have to decide, in which responsibility you want to put this form. For example I want to put this form under Purchasing Super User responsibility. Then press Find Button and select “PO_SUPERUSER_GUI” from LOV
6- And Now If I want to place this form in Item submenu then select the submenu option “INV_ITEMS” and copy this Ctrl+C.
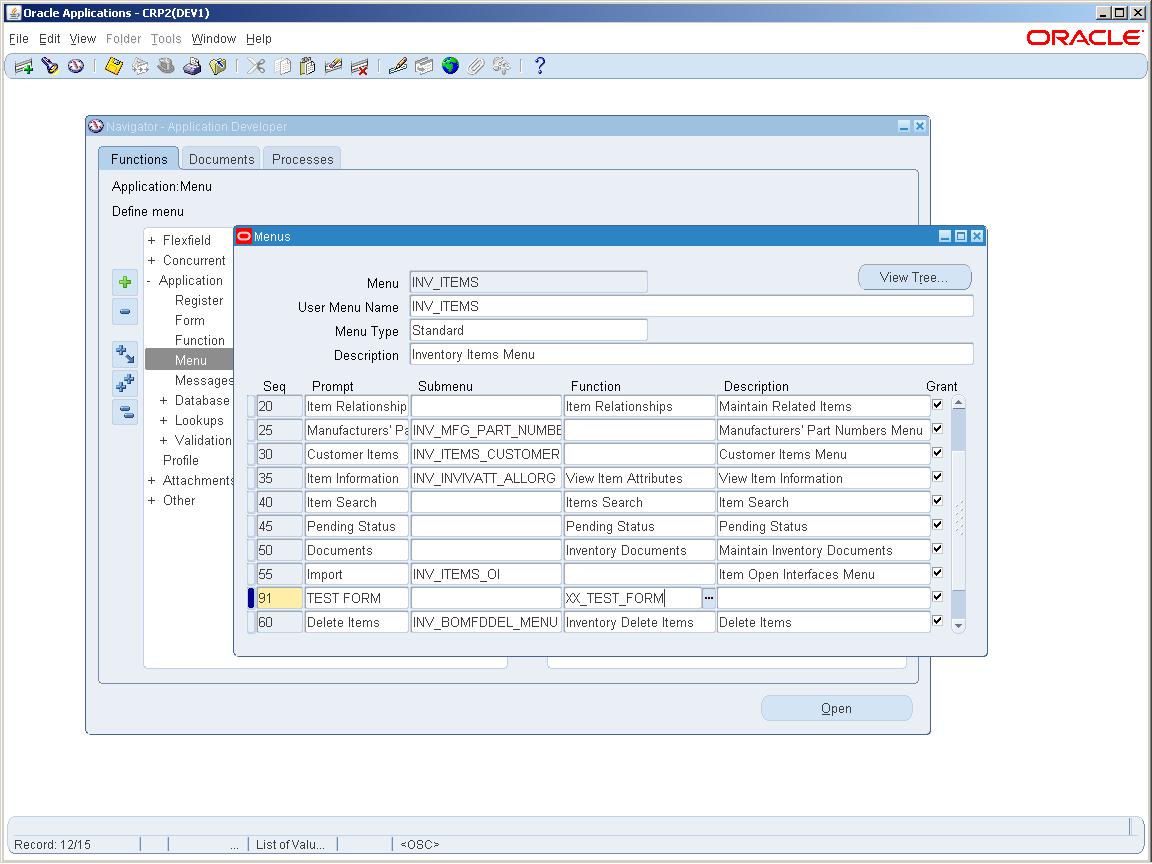
7- Move the cursor to the header part and press F11 then paste in Menu and press Ctrl+F11. Select the detail part and create a New Row then write Prompt what ever you want and then select the Function name form Function LOV which you have created in Step2.
8- Now your form is ready to use. Navigate to Purchasing Super user responsibility. You can see custom form under Item sub menu.


Hi Faisal,
Plz help i have developed a custom form, but it is not showing any info on Help–>Record History, it is giving a message as RECORD HISTORY NOT AVAILABLE, i did the following code in the PRE-FORM trigger
FND_STANDARD.FORM_INFO(‘$Revision: 999.01 $’, ‘XXALLOCSLCHGRP’, ‘XXCUST’,
‘$Date: 28-Jan-2008 12:02:49 $’, ‘$Author:
‘Syed Hussain’ $’);
app_standard.event(‘PRE-FORM’);
app_window.set_window_position(‘XXALLOC’, ‘FIRST_WINDOW’);
where
‘XXALLOCSLCHGRP’= Form name,
‘XXCUST’ = custom top ,
Any body can help on this.
Now the custom form is ready, only this info is needed. Plz help me.
Hope, You have Added who is Columns in DB Table and create trigger on Block Level.
Pre Insert and Pre Update
Add:
FND_STANDARD.SET_WHO;
Save and compile and then check.
I have added following columns. Now its working.
CREATED_BY Number
CREATION_DATE Date
LAST_UPDATED_BY Number
LAST_UPDATE_DATE Date
LAST_UPDATE_LOGIN Number